Have you seen those darling necklaces on pinterest that say "Thank you for raising the man of my dreams"? Well I originally wanted to get that for my soon to be mother in law as my gift to her but there is an issue. My soon to be mother in law doesn't really wear jewelry. So why would I get her something that has such a heart felt quote on it just for it to be tossed aside and never seen again.... That is not my style, if I give a gift I put a lot of thought into it hoping that the person will truly love this gift.
So the one thing this women has a lot of and loves are pictures! Why not take that cute saying and transfer it onto a darling picture frame. Then I saw pictures of those stacked frames, where there is a small 4x6 picture frame on a wooden plaque and thought to myself "Eureka! That is perfect!!!"
Well I tried finding DIYs on the stacked frames came up empty handed. So here is my version on how to do this!
What you'll need
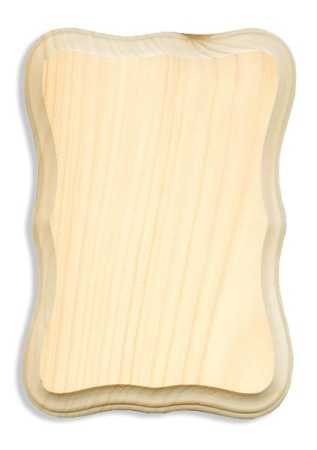
- A large wooden plaque, below is one that is similar to the one I used
- Spray paint, make sure you can use it on wood, in any color
- A simple picture frame, I used a 3.5x5, which ever size will fit the plaque along with the wording.
- Letter stickers, found in the scrap booking section, for this project I only needed two packs (I wanted a little variety and got two different type of letters)
- A clear coat top spray, I am using a satin acrylic finish
- Velcro adhesive

To begin take your plaque outside to a well ventilated area, I used my garage, and place the plaque down on either an old box or a tarp. Then spray paint the wood with which ever beautiful color you picked out, I used cranberry. Make sure you get all the edges really well, I ended up doing a full 3 coats and then had to do a touch up because Mr. Stimpy wanted to add his paw print.

Once the paint has dried cut out the letters you will need for the message, this way you can play with the set up before you stick them. Arrange the placing of the letter to be sure it fits, I had to pull the "Love, Olivia" out due to lack of room.

After you have placed everything in the position you want take a pencil and mark the edges of your frame lightly. Then take your frame back outside with your sealing spray, I used a sating finish acrylic spray. I ended up doing about 4 coats with this spray just be 100% sure the stickers were going to stay on. That satin finish gave everything a very nice matted glimmer, not to shiny but not to dull. You will then take you Velcro and and place two strips on the back of your picture frame.
Now take the opposite Velcro and place along you lines, bring the Velcro in just a tad bit to ensure you won't see it sticking out. I originally used for strips of Velcro but had to take two off. It was very difficult to take the picture frame on and off with four.
Now choose a picture for your frame and stick in on. (I want to put one in here from the wedding so it will be blank until then)
This project was very surprising to me because it was super easy and came out beautiful. The best part was the price, I think it came out to around $13 vs $50-$70 on etsy. You could also use stencils for the wording instead of stickers but I like the 3D texture they give the plaque.
Hope you all enjoy this and come up with some great ideas.
Until next time,
Olivia


No comments:
Post a Comment