Monday, December 9, 2013

Meatless Monday, Toss it all in Pasta!

My husband in a total carnivore, he eats veggies but there always has to be meat on his plate. On the weeks that I only cook lean meats he gets moody until I finally cook him some beef, what is it with men and beef? So last week while I was putting together my grocery list I asked him what he wanted me to cook for the week. To my surprise he asked for a total vegetarian meal, now I am not vegetarian but every now and then I like to do a meatless day. He also asked me to make the most insanely easy made from scratch pasta dish.

This pasta dish in so good that it doesn't even need meat, if my husband says that then it is true. I mean look at the picture of when we went to get some BBQ, he is a carnivore.


So I found this recipe on pinterest from this wonderful blog.

What you need
  • 12 ounces linguine pasta (I used Alfredo pasta and the added fiber kind, doesn't work well with whole wheat pasta)
  • 1 can (15 ounces) diced tomatoes with liquid 
  • 1 medium sweet onion, cut in 1/4 inch julienne strips 
  • 4 cloves garlic, very thinly sliced
  • 1/4 teaspoon red pepper flakes
  • 2 teaspoons dried oregano leaves
  • 4 1/2 cups vegetable broth (use regular broth and NOT low sodium)
  • 2 tablespoons extra virgin olive oil
  • 1 bunch (about 10 to 12 leaves) basil, diced
  • Parmesan cheese for garnish
Place pasta, tomatoes, onion, and garlic in a large stock pot. Pour in vegetable broth. Sprinkle on top the pepper flakes and oregano. Drizzle top with oil.

Cover pot and bring to a boil. Reduce to a low simmer and keep covered and cook for about 10 minutes, stirring every 2 minutes or so. Cook until liquid is at desired amount, I cook until there is about 1 inch of liquid.

Now I added to this recipe to put my own little swing on things. I added a green bell pepper, more red pepper flakes (my husband is Mexican and likes things spicy), and I added some mushrooms. This would be really with some asparagus and spinach too, I will try that next time. I tried using whole wheat pasta once and it did not turn out well. This dish needs the starch from pasta to make the sauce so yummy, I have used the vegetable pasta and the added fiber which both work well.

One Pot Pasta AFTER

I hope you all can have a very flavorful meatless Monday!

Until next time,
Olivia

Monday, December 2, 2013

Manly Man Stocking Stuffers

So growing up Christmas has always been a very big deal in my family. I remember I would always get so excited/nervous Christmas Eve night that I would end up waking up at 3 or 4 am (yes in the morning) and get sick (yes I would get so worked up I would go vomit..... sorry for that picture) then finally ending in bed with my mom. Only to rise a few hours later for my favorite part, STOCKINGS!!! My sister and I would get up and wake my mom up. Well my mom can not do anything in the morning before she has a cup of coffee in her hand (I never understood this until I myself became an adult). While she was "waking up", it is such a process for her, my sister and I would start to dive into our stockings.

As I am now an "adult" living with my husband I have taken the stocking tradition into my home, but I still have one at my mom's. I put adult in quotation marks because I see it as my personal responsibility to be the child this Christmas since my sister and nephew will not make it home from California, very sad. Anyway, Tony is not a materialistic man in the slightest which is quiet nice but absolutely a headache when it comes to trying to find gifts for him, let alone small stocking stuffers. Therefore I am compiling a list of great stocking stuffers for the man in your life that really doesn't want a lot of clutter.

Manly Man Stocking Stuffers
  • Pocket Knife/Box Cutter (I did this one last year and he doesn't leave home without it..I use it a lot as well)
  • Beard comb
  • After Shave, this one has great reviews
  • Beef Jerky, Venison Sausage, any Jerky or Sausage that is high in protein basically
  • A smaller hatchet, these are great for camping trips
  • Their favorite sweet treat, Tony's is Reese's
  • Hunting accessories for a bow, gun, a new call, or scent killer (Here is one idea)
  •  Socks, everyday cotton socks or wool socks or dress socks
  • Chap stick, not a girly scent or tinted make sure you get a regular chap stick for a man
  • Nail Clippers, they always get lost so just get another one
  • Gift certificate to their favorite restaurant, coffee place, or manly great outdoors store
  • A pocket Bible, even though their is a Bible app now but some men like to kick it old school
  • A letter from you expressing your love for them and thanking them for being such an amazing man and for being your hero (men love to be reminded that they are heroes).
I hope that you may have a very very very Merry Christmas and cherish the memories you are making with each other. The true meaning of Christmas is to celebrate the birth of our savior Jesus Christ, the one who gave his life for you and I to have a second chance. For some Christmas can be a very sad time of year because they may not be able to afford to give these gifts to their husband, wife, or children. Just know that Christmas is not about the gifts and turkey dinner, it is about God and His Son Jesus. Instead of getting someone a physical gift, when your budget really doesn't have room for it, try instead to give them the greatest of all gifts by inviting them to church or simply just asking the question, "Do you know who Jesus is?" This is the most meaningful gift you could ever give anyone.

Have a very Happy Birthday Jesus Day!!!

Until next time,
Olivia

Wednesday, November 27, 2013

Only once a year recipe

This potato dish is only aloud once per year because of how delicious they are, or maybe it's because they are so unhealthy. I always make these for Thanksgiving, used to take them to the fridged morning Lions Fan tailgate Thanksgiving dinner but this year I will not be going to the game (shedding tears right now). Anyway, if you would like to add something to you menu that the entire family will love try these out.

What you will need
  • 5 pounds of red skin potatoes
  • 1 pound of bacon
  • 2/3 to 1 stick of butter
  • Grated parmesean cheese
  • An entire garlic clove, roasted
Directions

1.)   Wash and cut your potatoes to ruffly 2 inches, see picture below.


2.)   Transfer potatoes to a large pot of water, bring to a boil. Let them boil for around 10 minutes, you don't want them to be to soft yet not firm. I test it with a fork, if the fork goes into the potatoes easily but doesn't drop off then they are done. Drain and cover with cold water.

3.)   While potatoes are cooling start making your pound of bacon, KEEP THE GREASE

4.)   About half way through making your bacon the potatoes should be nice a cooled, transfer to a 11 x 15 oven safe pan.

5.)   After finishing the bacon take the grease and pour half of the grease onto your potatoes (this is just the start of it). Give your bacon a nice chop and add to the potatoes. Chop your roasted garlic and add to potatoes. Now sprinkle on the parmesean cheese, this depends on your taste, I use around 3/4 or a cup.

6.)   Fold your potatoes to mix all ingredients, be careful to not mash your potatoes

7.)   Sprinkle the top with a little more cheese and take thin squares of butter to place on top, see picture below.


8.)   Bake at 350 F for 20 - 30 minuets, until butter is melted and cheese is a golden color.


I hope you really enjoy your Thanksgiving dinner, I know I will.

Until next time,
Olivia

Wednesday, November 6, 2013

A breakfast fit for a Cowboy

Hello Everyone,

So now that life has calmed down a little bit, or so I like to imagine, Tony and I are back to doing my favorite thing as a couple..... Making breakfast together!!! But this past weekend it was just me making breakfast because Tony went into work but only until 11am. So on his way home I asked him what he wanted to eat for lunch, his response was breakfast. So I looked to see what was available and came up with the Cowboy Scramble.

What you will need
  • 6-8 eggs, depending on how hungry/how many you are cooking for
  • half a bag of the southwest hash browns
  • 1 green pepper
  • 1-2 hot peppers, I used the Thai chilli's but jalapenos taste amazing too
  • 1 medium white onion
  • 1 cup shredded cheddar cheese
  • Bacon (I used turkey bacon but you can use whatever your taste buds are craving)
  • Country pepper gravy mix
Set your stove to a medium heat and add either cooking spray, butter, or what I used coconut oil. Once that has melted add the half bag of southwest hash browns. Once the hash browns are nice and golden brown add your chopped green pepper, hot peppers, and onions. Mix these around until you can start to smell them.

Once you smell your peppers and onion you can add your eggs. I mixed mine up with a little salt and pepper for flavor.


While the eggs start to cook, start your gravy. Once your eggs start to cook and get a little hard then you add your cheese!


If you are a cheese lover that go ahead and toss some more in. Depending on if you cook up all the bacon or just some, determine when you should start it. I usually cook about half of it at a time so I start my bacon when I start my hash browns.

Now your eggs should be done, the cheese should be melted and the gravy should be hot! So time to start stacking it.

Take a scoop on the scrabble eggs, spoon some gravy on top of that, and top it all with a few strips of bacon. I also made a side of toast to scoop up my eggs, yum yum yum.

As with all my recipes please make them your own. Depending on how I am feeling determines what veggies I will be using. Sometimes instead of having it spicy I will use regular hash browns or homemade american fried potatoes, or I will add mushrooms and diced ham. So have fun with it and if your hubby/wifey is home get them in the kitchen with you.

A couple that can cook together will last forever!

Talk to you later now,
Olivia

Wednesday, October 9, 2013

Wedding Arch

Hello Hello,

I just wanted to take a second and update everyone following this post with a few pictures of the arch from my wedding!


 Here in this picture you will see a chain with two locks locked onto it. Well instead of doing a unity candle or the unity sand we decided to do something a little different.
We had our names engraved on a pad lock to represent us as individuals. Then I got a chain that represented God and we intertwined our locks together and then through the chain to represent the trinity. After that Tony took the keys and tossed them into the river to never been seen again.

Hope you enjoy the pictures!

Below is the original post on how to build this beauty!!!

                                                                                                                                
Hello all,

So my wedding is this weekend and I am so excited! I just wanted to share with y'all how a 30 year old man who seems to really be 12, a father of the bride who says crick instead of creek, a stressed out bride, and two Nana's (my mother and step mom) could all put together the most amazing wedding arch I have ever laid eyes on. This project was incredibly easy just a little time consuming due to the fact of building it 4 hours from my home.

We started it the weekend of July 4th with my fiance and father trekking out into the woods to find some fallen timber. Once they brought it back I showed them a few pictures of what I like and they got to work with screwing the posts together.

I chose the front piece because of how it curved and just looked very unique. The boys had to put some cross pieces to try and stabilize the structure. No worries though, once the cross pieces were put in that thing was not moving. 


And boom it's that easy to put it together, if these two guys could do it than anyone could.

Also my Dad had a few pallets laying around that we used. I really liked the look of the weathered wood up against the natural wood.


After the, now men, finished the task of building it, my mother, step-mother, and I had the task of finishing it. I went to my local Hobby Lobby, or any craft store around you, and picked out some very beautiful fall inspired artificial flowers. This was the only expense of making this arch and came out to be around $75. Now to attach everything we used the small zip ties and placed them so you wouldn't be able to see them. If any zip ties were visible then I would wrap twine around the stems to make it look like they were tied on.


See super easy!!!

I also have made burlap runners, cake plates, my flower girls tutu, hillbilly wine glasses, and a few other things for my wedding. Hopefully after the wedding I will be able to do some more tutorials. In all honesty it's really nice to make your own items for your wedding because to me it makes it more personal.

Hope everyone has an AMAZING weekend..... I am going to get hitched.

Talk to you later,
Olivia


Wednesday, September 18, 2013

Comfort Food

Hello everyone,

Wow it has been way to long since I last posted on here. Life for me has been so busy with the Equestrian Team season, school started, work continued, and my wedding is now only 24 days away. In the midst of all the chaos the cooler weather of fall has arrived!!! Which means I am making comfort foods and also means Tony is Happy, Happy, Happy!!!

So last winter after Tony had bought our home I wanted to have a nice dinner for my mother, father, sister (who was in from Cali), and my stepmother. So what better dinner to make right after Christmas than a pot roast! Well we ended up with pizza... Ooops

I found a recipe online that had great reviews so followed it to a tee, which I usually don't do. When I pulled open the lid it smelled and looked oh so very very good. EEEEEEHHHhhh wrong! The meat was still very hard and chewy :( therefore I just ordered pizza because that is always my go to meal!

This time was a totally different story! The pot roast I made was oh so so so flavorful and tender and just very very yummy. Kraft has these new items called Recipe Makers which pretty much does everything for your minus the cooking but that is what the crockpot is for! I used the New England Pot Roast Recipe Maker and all the directions are spelled out for you on the box.

Ingredients

1 boneless beef chuck roast (2-1/2 lb.)
1lb. small red potatoes, quartered
1lb. baby carrots
1 onion, cut into wedges
1 pkg.  (16.6 oz.) KRAFT RECIPE MAKERS New England Pot Roast

First cut your red potatoes in halves or quarters depending on the size you buy and cut your onion. Then put your hunk of meat in your crock pot top with the onion, potatoes, and carrots.

Top all of that with the first sauce from your Recipe Makers box, Simmer Sauce.

Cook on low for 8-10 hours


Once it has finished add in the Finishing Sauce and set on high to cook for 15 minutes.


And boom you are done! Super easy right? Below you will see the plate I made for myself. I made some yeast rolls topped with Italian seasoning and parmesan cheese with a side of cottage cheese. This was just what the doctor order to warm my belly after a day that barely made it to 60, bring on the snow!

Until next time (hopefully not two months from now),
Olivia


Wednesday, August 7, 2013

Chicken Stuff

So yesterday I took the day off from life. I was not feeling well at all so I decided to have a "I'm not getting out of my pajamas day." Not only was it one of those days but it was also cloudy with a nice chill in the wind. When you add up all of those conditions you get........ Comfort Food Day!!!

I did not feel like making anything that did not require my crockpot so I made, as Tony likes to call it, Chicken Stuff. This is by far one of the easiest dinners you will ever make and oh so yummy.

What you'll need
Two or three chicken breast
Two packets of chicken gravy
Two cans of chicken broth or water
2 tbs. Chicken bouillon
2 tbs. Garlic Powder
1 tbs. Onion Powder
1 tbs. Paprika
Mashed Potatoes or Rice

Directions
Take your two chicken breast and place them in your crock pot

Add your two cans of chicken broth or two cups of water

Add you seasonings into the crock pot, if you are using water you will need to add extra chicken bouillon

Cook on high for 6 hours


When the chicken is almost done start your potatoes to make mashed potatoes or you can use the instant mashed potatoes.

After cooking for 6 hours your chicken will be nice a tender. Take it out and shred it up.

Cook your two packets of gravy by following the directions on the back of the package.

Once gravy is done mix together both gravy and shredded chicken.


Now take a nice helping of your mashed potatoes and top it with your chicken.

I served this with some yummy steamed broccoli and cauliflower.

Enjoy!


Until next time,
Olivia

Monday, August 5, 2013

Cake Stands

So my wedding is only 68 days away!!! Oh how I can't wait to walk down the aisle and vow to the love of my life that I will be his forever. Even though I wish tomorrow I would be saying "I do" in reality I am happy that I still have 68 more days because there is still so much to do! AHHHH!

I know this is another craft but I really haven't had a lot of time to cook this past week.

So almost everything at my wedding is DIY; the center pieces, the wedding arch, the gifts that I am giving my bridesmaids and soon to be mother in-law, the invitations, all the way to the flower girls tutu. Not all of my center pieces will be the same though. Since my dinner and reception will be on an old paddle boat I need to bring in a few tables and ended up using 4 cocktail tables. The the 4 cocktail tables I wanted cake stands with mini pumpkins stacked in the shape of a pyramid. Now cake stands, I found out, are not cheap at all. Yet they are super easy to make and super cheap to DIY.

Sorry for the lack of photos, I am still trying to get the hang of this blogging lifestyle.

What you'll need:
Plates, either white or clear (I picked two different textures)
Epoxy
Candle sticks (or a neat drinking glass)
Spray paint
Primer (only if your plate isn't one color or the color is darker than your spray paint)
Garbage bag/new paper to cover your working area

First pop open your epoxy and try to squeeze even amounts onto a paper plate and mix well, follow directions on the label. Next take your plate and flip it upside down. Then take you candle stick and goop up the epoxy and slather it on the top of the candle stick. The plates I bought have the manufacturer stamp in the middle so I used that as guidance for the placement of the candle stick. Once you have positioned your candle stick place a heavy book on top of it to help give it a hard seal.

The epoxy dries quickly but let them dry over night just to be safe.

Next day check them out, I thought the looked great without the spray paint.


Now that the gluing is finished all you have to do is spray paint them. Take the stands outside in a well ventilated area, I used my garage due to the rain, and place them on an old tarp or something to protect the cement/yard. I started to paint them stem side up first. Since the stems were clear it took a few extra coats to have them perfect. All in all I believe I ended up with 4 coats of spray paint, 5 or 6 on the stems.


Once they are finished enjoy!

** If you plan on using these for food please be advised that placing food on spray paint can be harmful. Please use a doily for cakes and make sure cupcakes have liners 

Wednesday, July 31, 2013

A simple craft for my mother in law's gift

Have you seen those darling necklaces on pinterest that say "Thank you for raising the man of my dreams"? Well I originally wanted to get that for my soon to be mother in law as my gift to her but there is an issue. My soon to be mother in law doesn't really wear jewelry. So why would I get her something that has such a heart felt quote on it just for it to be tossed aside and never seen again.... That is not my style, if I give a gift I put a lot of thought into it hoping that the person will truly love this gift.

So the one thing this women has a lot of and loves are pictures! Why not take that cute saying and transfer it onto a darling picture frame. Then I saw pictures of those stacked frames, where there is a small 4x6 picture frame on a wooden plaque and thought to myself "Eureka! That is perfect!!!"

Well I tried finding DIYs on the stacked frames came up empty handed. So here is my version on how to do this!

What you'll need
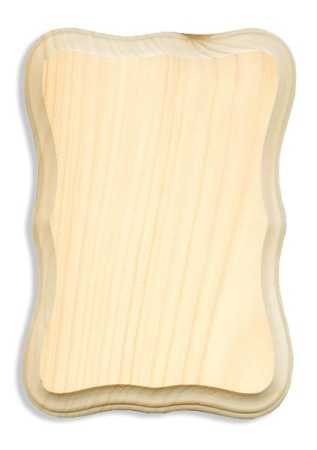
  • A large wooden plaque, below is one that is similar to the one I used
  • Spray paint, make sure you can use it on wood, in any color
  • A simple picture frame, I used a 3.5x5, which ever size will fit the plaque along with the wording.
  • Letter stickers, found in the scrap booking section, for this project I only needed two packs (I wanted a little variety and got two different type of letters) 
  • A clear coat top spray, I am using a satin acrylic finish
  • Velcro adhesive


To begin take your plaque outside to a well ventilated area, I used my garage, and place the plaque down on either an old box or a tarp. Then spray paint the wood with which ever beautiful color you picked out, I used cranberry. Make sure you get all the edges really well, I ended up doing a full 3 coats and then had to do a touch up because Mr. Stimpy wanted to add his paw print.


Once the paint has dried cut out the letters you will need for the message, this way you can play with the set up before you stick them. Arrange the placing of the letter to be sure it fits, I had to pull the "Love, Olivia" out due to lack of room.


After you have placed everything in the position you want take a pencil and mark the edges of your frame lightly. Then take your frame back outside with your sealing spray, I used a sating finish acrylic spray. I ended up doing about 4 coats with this spray just be 100% sure the stickers were going to stay on. That satin finish gave everything a very nice matted glimmer, not to shiny but not to dull. You will then take you Velcro and and place two strips on the back of your picture frame.


Now take the opposite Velcro and place along you lines, bring the Velcro in just a tad bit to ensure you won't see it sticking out. I originally used for strips of Velcro but had to take two off. It was very difficult to take the picture frame on and off with four.

Now choose a picture for your frame and stick in on. (I want to put one in here from the wedding so it will be blank until then)


This project was very surprising to me because it was super easy and came out beautiful. The best part was the price, I think it came out to around $13 vs $50-$70 on etsy. You could also use stencils for the wording instead of stickers but I like the 3D texture they give the plaque.

Hope you all enjoy this and come up with some great ideas.

Until next time,
Olivia

Saturday, July 27, 2013

Ribs Ribs Ribs

Yesterday I tried to make ribs for the very first time. I had one of my soon to be sister in-law, her son, my mother, and my fiancé as my taste testers. Well my little nephew in-law ate at least a half slab without leaving a trace behind on the bone but had BBQ sauce all over his face and fingers..... I think they turned out pretty good. I love when I have family over for dinner and my new recipe becomes a hit, unlike my pot roast earlier this year.... oops

Well now lets cut to the chase. I posted a grocery list yesterday but here are you ingredients again;

Ribs
  • 1 Package Back Ribs (side ribs will work but will take longer to cook)
  • 2 Large Onions
  • 4 cloves Garlic, sliced
  • Olive Oil, Salt & Pepper (see note below) OR BBQ Sauce Below (or both!)

  • Rib Rub
  • 1 tablespoon Paprika
  • 1 tablespoon brown sugar
  • 3/4 teaspoon garlic powder
  • 3/4 teaspoon onion powder
  • 1/2 teaspoon black pepper
  • 1/2 teaspoon lemon pepper

  • Instructions


    First take all of your seasonings for you rib run and combine them into one bowl.


    Next take one large onion or two small and cut them up like so


    Not take you ribs out and don't forget to pull that white membrane off of them. Than place onto a foil lined baking sheet and give them a nice massage with  the rib rub. When you place the ribs done make sure the bony side is on the bottom side. Next take your onion and garlic and spread them around onto your ribs.


    Cover your ribs with some foil nice a tight, still allow some breathing room but make sure all corners are sealed. Then put them in the over for 2 hours at 275. Open up the corner and check to make sure they are tender. If the aren't put them back in for another 20 minutes. Mmmmm they will make your house smell so good!


    If you have a charcoal grill like I do about 40 minutes before the ribs are done get that bad boy started, you want your charcoal to be nice a grey.

    Once the ribs are done transfer them outside carefully, your baking sheet will have lots of juice in it. Toss them on the grill and slather them in your favorite sauce, I used a Kansas City BBQ sauce. After about 10 minutes flip them and sauce up the other side.


    Once you have some nice sticky sauce and some charcoal marks they are ready to eat! Make sure you have everything you need before you start eating because these are messy messy messy!!!! (Best way to have them!)


    I served these up with a yummy cucumber salsa, potato salad, and some great grilled corn! Hope you all enjoy!

    Until next time,
    Olivia